When looking for a wireless unit for use in a measurement system, you can't just use any old budget mic system. This is because most wireless microphone systems use a compander (Compressor/Expander) to increase the effective dynamic range of the radio link - I won't go into details here, but the main point is that these companders are not phase coherent, and will not provide you with an accurate phase trace when used in a measurement system. However you can however still use these systems for time-domain measurements - for instance using a pair of impulse responses to line up a main system with a delay system, but you couldn't accurately use them to line up Subs or troubleshoot phase-based interactions between sources.
With the rise of digital RF systems, it's become possible to sample a signal fully, transmit it, and fully reconstruct it at the other end without compression and expansion - however not all digital systems actually do this, so careful testing should be conducted before trusting measurements in the field.
Options
There are however a number of options available that are fully phase coherent and at least somewhat designed for this application:
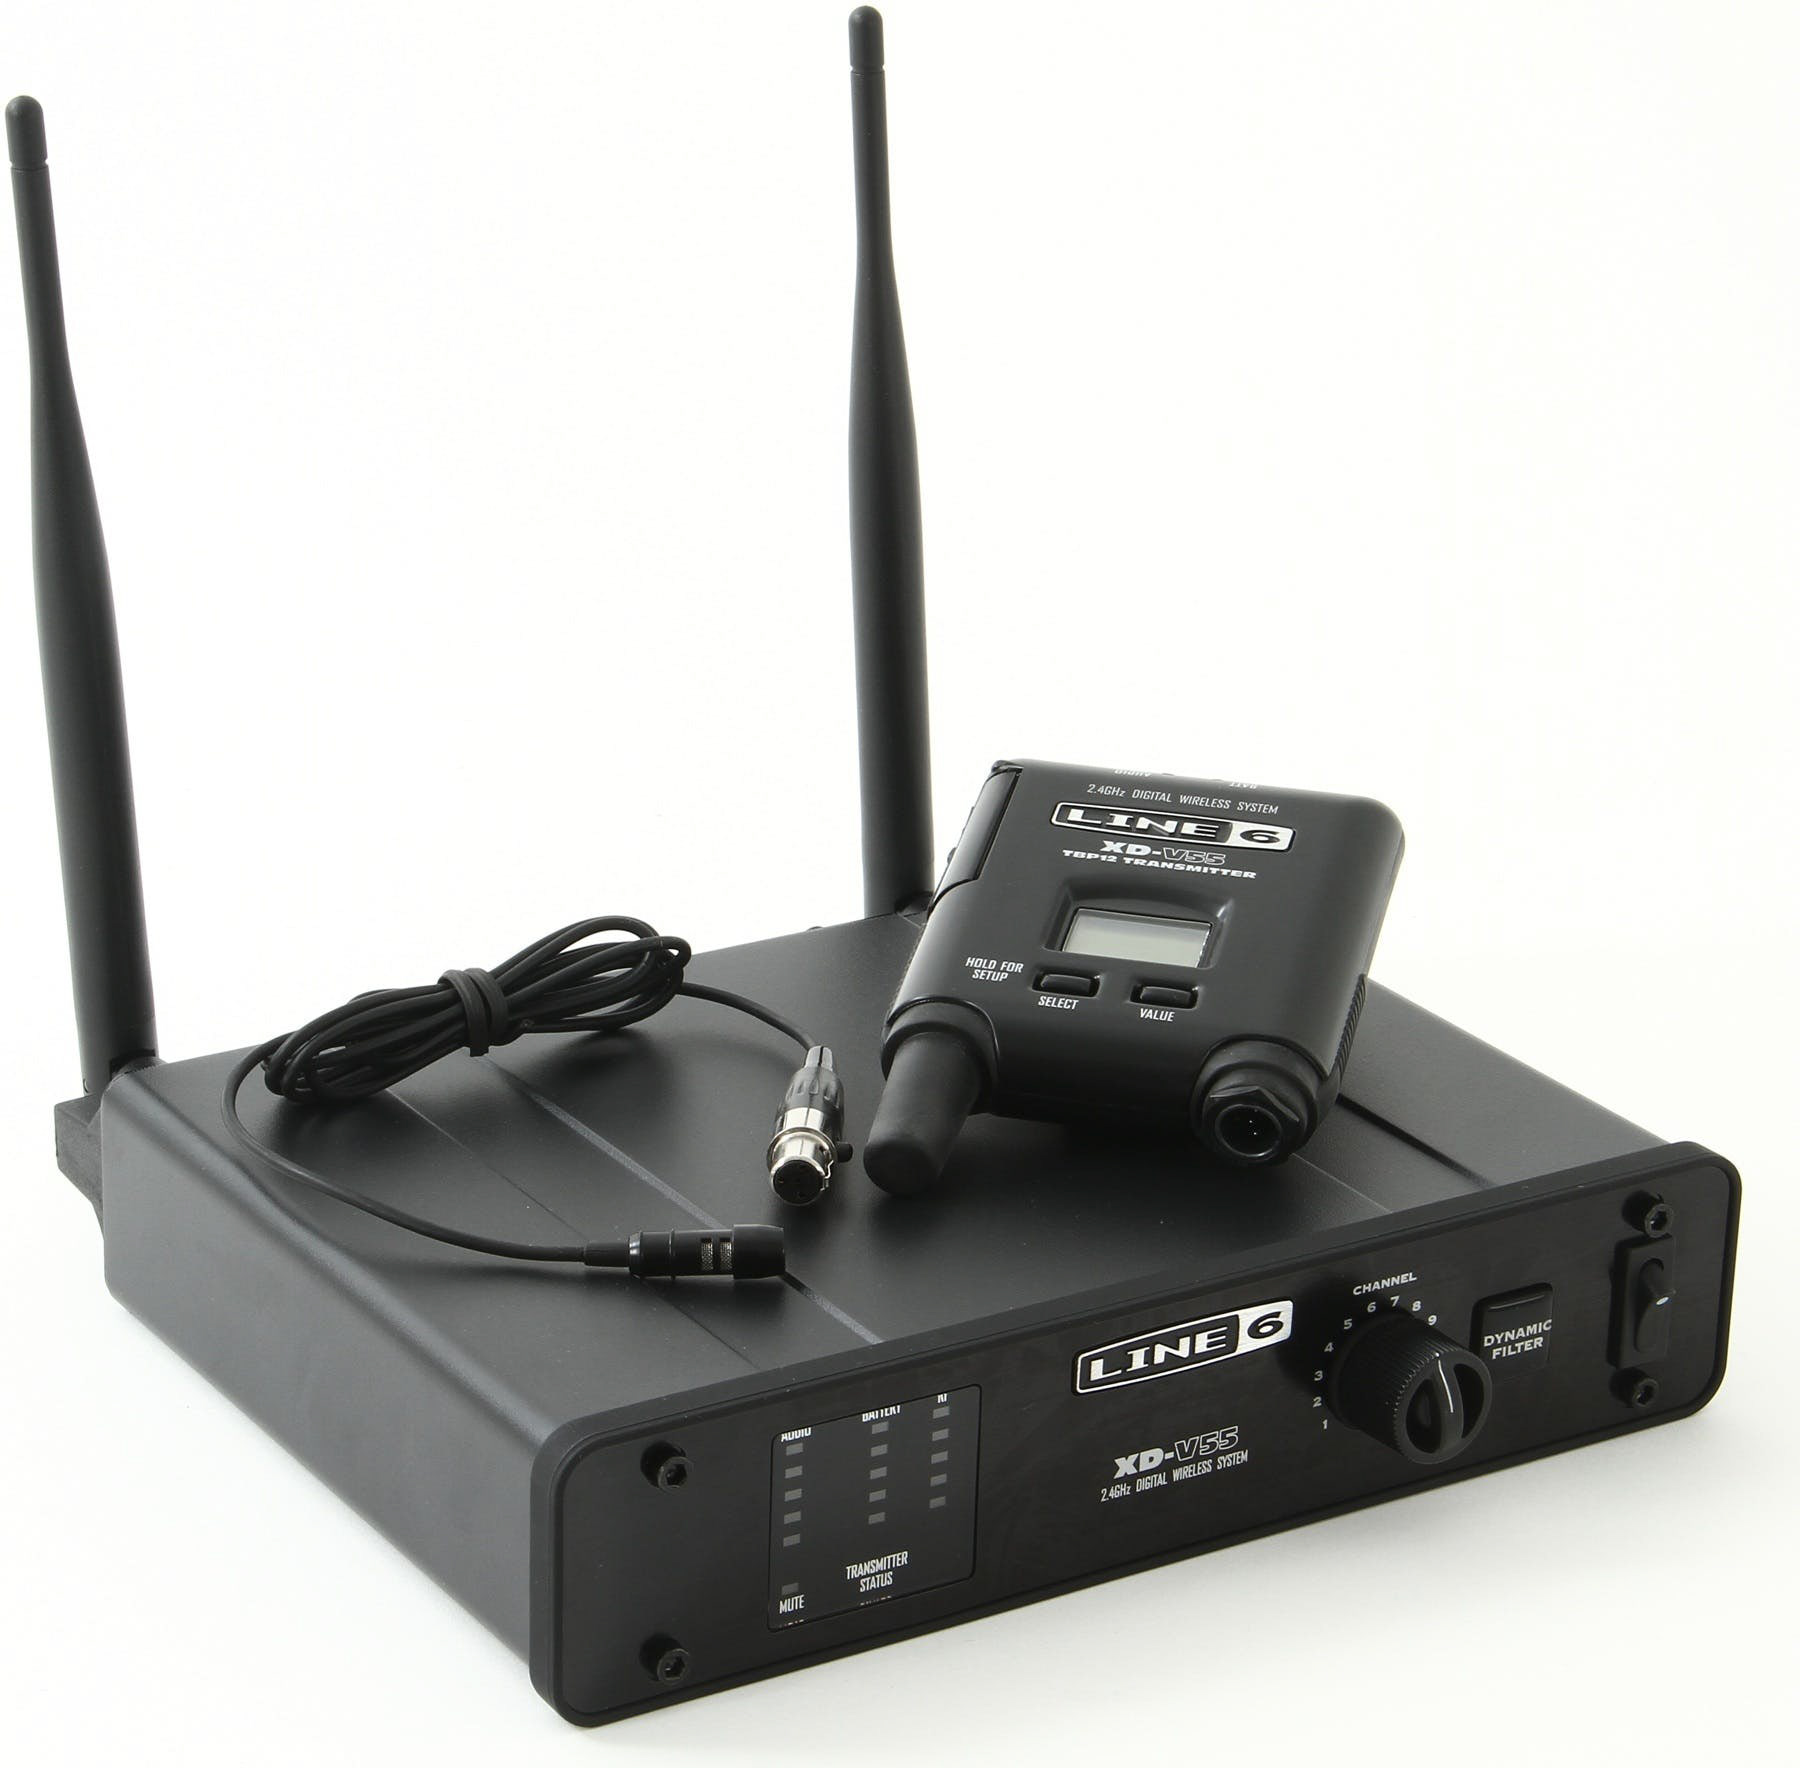
Line 6 V-55/V-75
These systems are great, I've owned one for 5 years now, and I've used them right up to large arena deployments without a great amount of issues. Both ISEMcon and MELLab sell small measurement mics that will plug directly into the mini XLR on the top of the pack, making for an extremely compact transmitter solution.
The main drawback here is that these RF systems are in the 2.4gHz frequency range, and thus firstly suffer interference from local Wifi networks, but also secondly are much less able to cope with not having line of sight between the TX pack and the receiver.
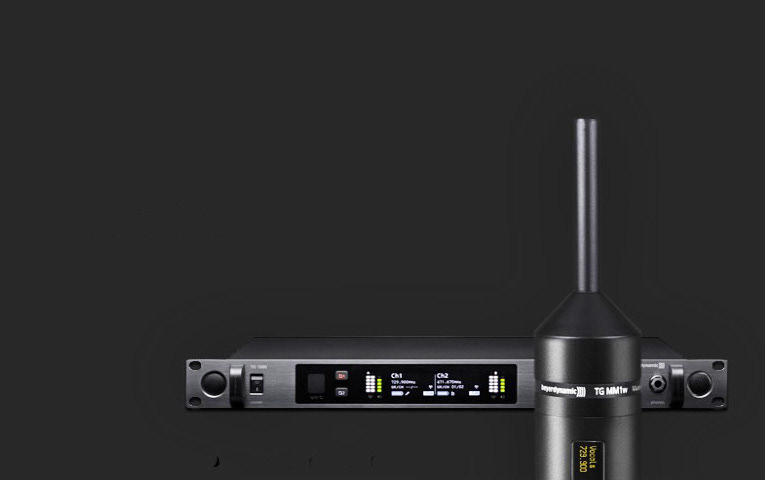
Beyerdynamic TG1000
Next up is this beast of a system, the transmitter is a very neat traditional handheld mic body with a specially made capsule based on Beyerdynamic's MM1 measurement mic. They've got dante onboard on the receivers which makes integration super easy, and they generally feel like a high-quality professional system.
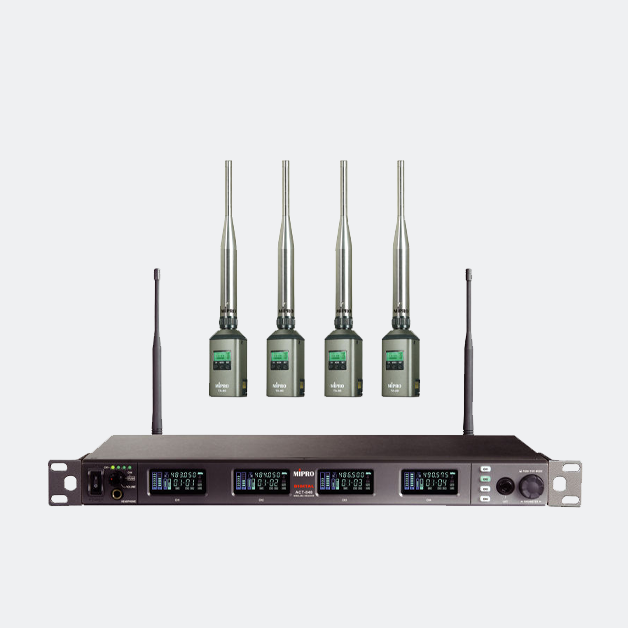
Mipro ACT Digital
These systems look really promising, but I have to admit I've yet to actually see one in the flesh.
First of all - there's 3 types receiver, allowing up to 4ch in a single rack unit, making for a very compact setup with the P1 or multi-mic Smaart rigs. These are also available with Dante onboard, reducing the need for a bulky 4ch soundcard.
The transmitters are designed with rechargeable batteries and a slot-in charger which makes them super convenient.
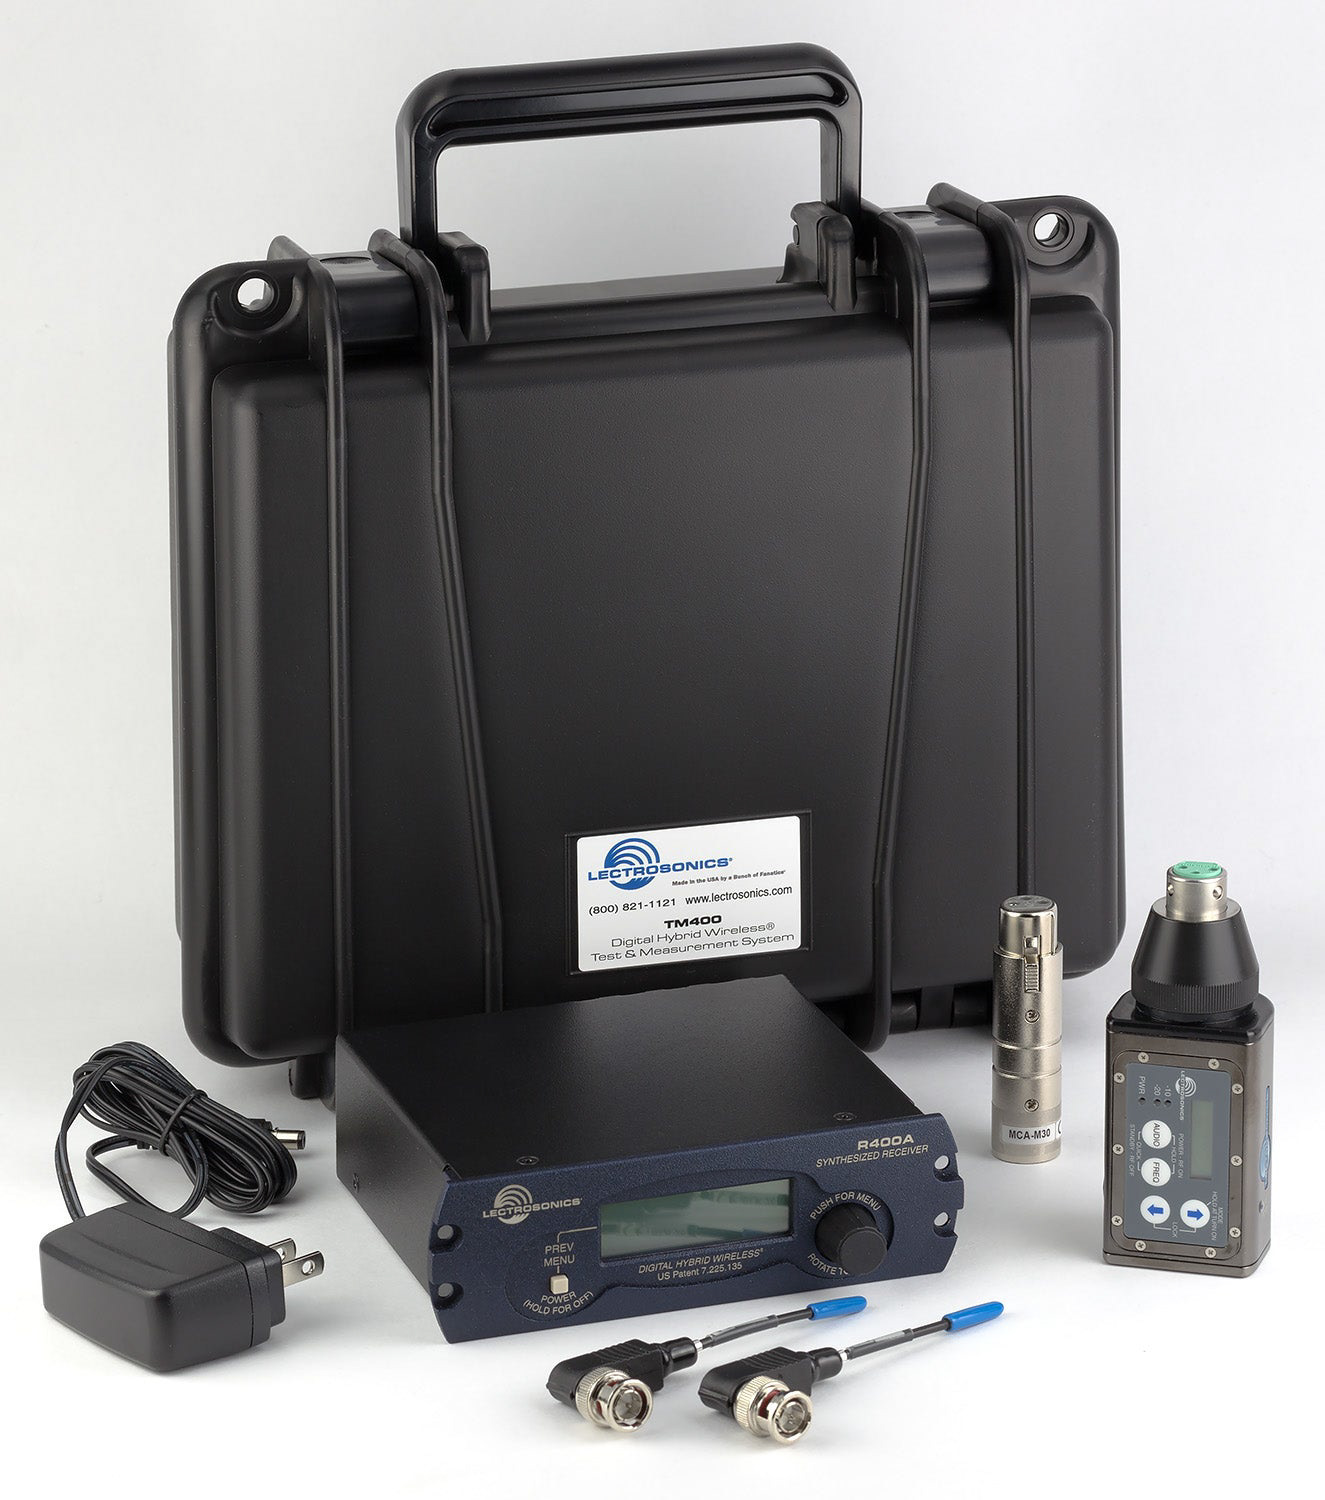
Lectrosonics R400a /HMa
Finally we have the defacto 'gold-standard' measurement system, as sold by rational acoustics themselves, and trusted by system engineers worldwide. Lectrosonics are perhaps best known for their share of the US film/location sound market, but have produced their "digital hybrid" systems for some years now, and with this came the R400a receiver and HMa transmitter.
Sold as a complete kit in a hard case, this system has become the go-to for many A-List companies, and really is a very good bit of kit.
My Decision - Lectrosonics!
One of the main reasons I was looking to upgrade my current line 6 system was to make it easier to fly with on a tour I had coming up. Initially I settled on the MiPro ACT818 system, but it seemed very difficult to get hold of one in the UK, after trying for some time I realised I may need to look elsewhere.
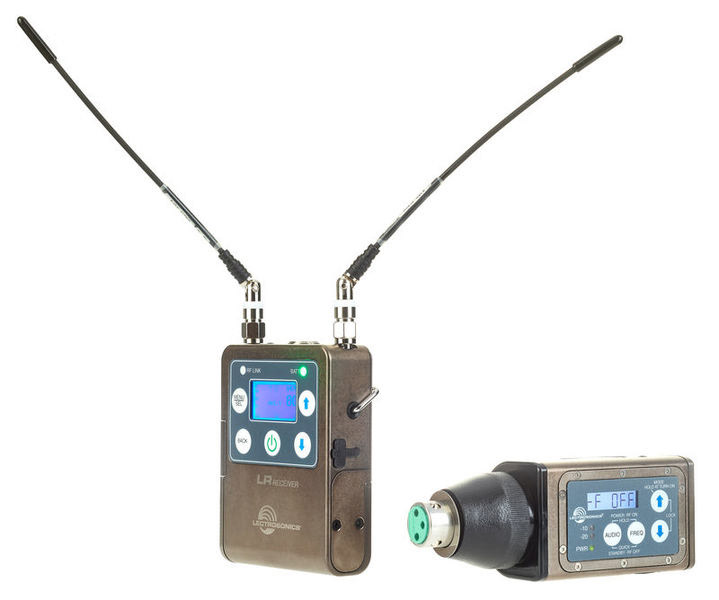
So I decided to look deeper into the Lectrosonics system, and it turns out the R400a kit isn't sold in the EU, so you need to purchase the LR receiver instead, which amazingly is a beltpack sized unit. This is ideal as it makes for a really tiny and light system that's perfect for fly gigs. The only 2 bits you need are shown to the left, no bulky PSUs or big antennas.
Power - AA or USB-C?
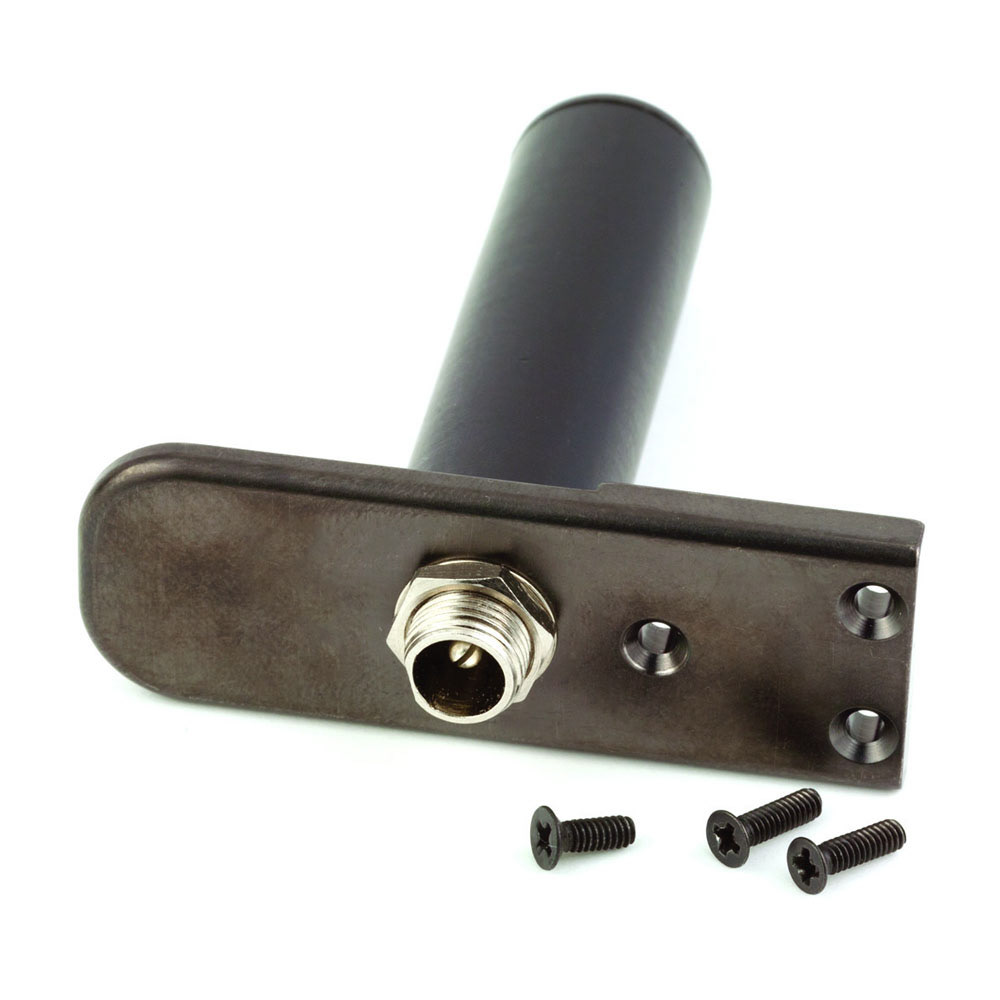
The LR receiver is powered from 2 AA batteries by design, however if you want to use it in place of a traditional racked receiver, this can get expensive very quickly. Thankfully the clever boffins at Lectrosonics have made what they call a 'Battery Eliminator' which replaces the battery door and provides a lockable DC input on the side of the unit.
The specification of this input allows an input voltage of anything between 5 and 25 volts, which is super handy because it should allow it to be run from a normal USB socket providing the current is low enough. I thought this would be a great idea, as I'd always have a USB socket on hand, and could use a charging pack in a pinch if needed.
Unfortunately while the LR will run on 5v, it's not enough to account for the current draw as the pack boots up, so it needs at least 6.5v or so to function normally. Thankfully, with USB-C/USB-PD on the rise, 9-12v power supplies are a lot more accessible than they were a few years ago, and would still make for a convenient way of powering the LR.
It's worth noting that the center pin on the connector in the battery eliminator is split but might be shipped pressed together - this makes the power connection intermittent, but can be fixed by carefully prising the pin apart with a small screwdriver.
Mic Compatibility
Due to the way Lectrosonics have implemented the phantom power on their HMa packs, there's some significant compatibility issues with certain condenser microphones. After some trial and error work at the Solotech warehouse in Redditch, I've found that it's basically only my Audix TM1-Plus that isn't compatible without a special barrel adapter, while most other options (Beyerdynamic MM1, Earthworks M30, Behringer ECM8000) seemed to work fine.
I ended up buying a second hand iSEMcon 7150 which works perfectly for me.
LR Holder
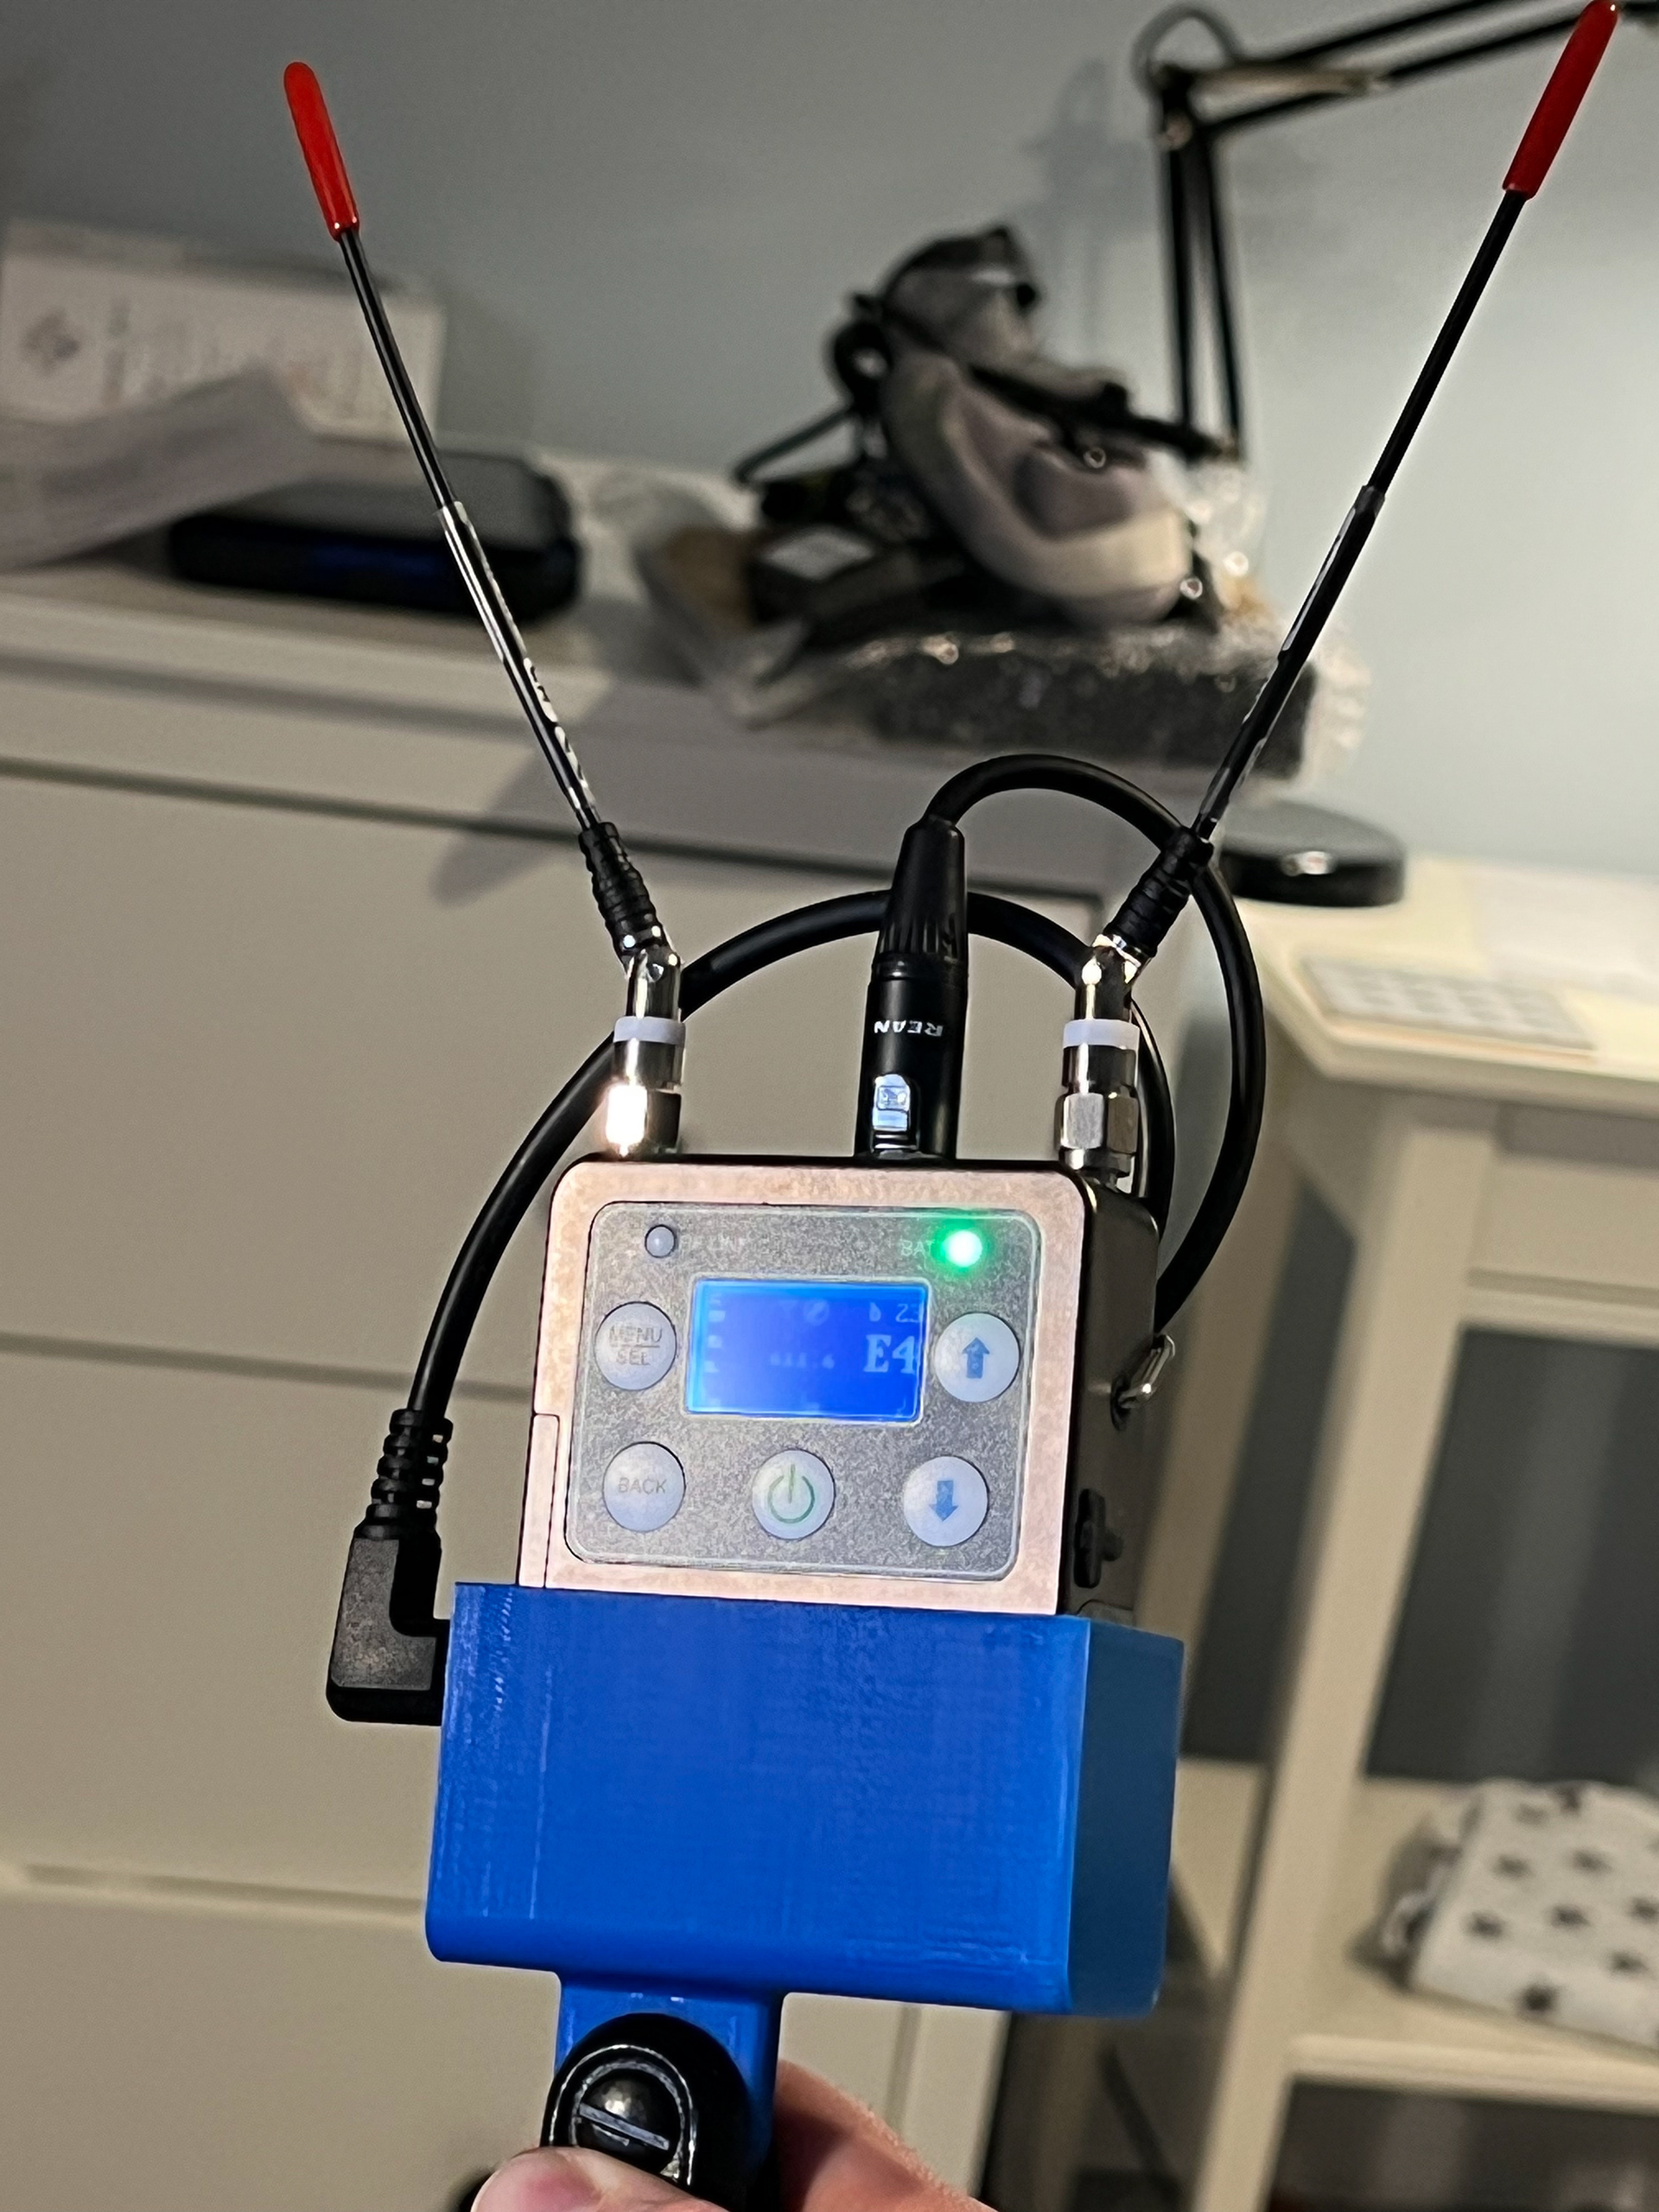
The LR Receiver is super comapct and comes with two short whip antennas that are surprisingly good. However these would be a lot more effective if the whole LR unit was raised to around head height rather than buried under cables on a table. Of course, I could have just jammed it into a large mic clip and been done with it, but that seemed bold given the risk of it falling from height during a gig.
So I set about designing a fully custom holder that I could 3D print and get exactly right (well that was the theory anyway). I used a website called onshape, which is free so long as you don't mind your designs being public. After about an hour with a set of calipers I had a design ready to go, and I could then export it as an .stl file which could be sent of to be printed. After a bit of searching, I used a website called craftcloud to print and deliver the design - they had a great range of materials and delivered the finished part in 3 working days which is pretty good.
Naturally I'd made some errors in the design - firstly the slot for the LR was far too tight - it would fit but you'd need to hammer it in and never take it out again. I very carefully made this slightly bigger by scraping away a layer of the plastic with a chisel - crude but it worked.
Secondly the slot on the side was in slightly the wrong place for the power connection, and prevented you from being able to screw the locking ring in properly, again more chisel action fixed this. Finally, the slots on the back where the belt clip sits were also in very slightly the wrong place and you can probably guess how I fixed that...
Testing
Remember it's always important to test a new measurement system before taking it out into the real world, so that you know that you can trust the measurements you're taking.